Complete Breast Pump Guide: Types, Flange Sizing, Pumping Schedule & CDC Cleaning Tips
Manage Easier with BebeSnap
Get Started FreeIf you are planning to breastfeed, a breast pump is one of the most important investments you will make. Whether you are returning to work, building a freezer stash, managing oversupply, or exclusively pumping, the right pump can make the difference between a sustainable breastfeeding journey and an exhausting one. But with manual, single electric, double electric, hospital-grade, and wearable options on the market, choosing feels overwhelming. This guide walks you through every type of breast pump, how to find your correct flange size, step-by-step pumping instructions, recommended schedules for different situations, CDC cleaning guidelines, common problems and fixes, and tips for pumping at work.
Breast Pump Types: Side-by-Side Comparison
Breast pumps fall into five main categories. Understanding the differences helps you match the pump to your lifestyle.
| Type | Pros | Cons | Best For |
|---|---|---|---|
| Manual | Affordable, lightweight, silent, full suction control | Slow, wrist fatigue, one breast at a time | Occasional pumping, travel, backup pump |
| Single electric | Faster than manual, frees one hand, moderate price | One breast at a time (doubles total time), less efficient | 1–2 sessions per day, supplemental use |
| Double electric | Both breasts simultaneously (halves time), boosts supply, hospital-strength suction | Bulkier and heavier, higher cost, needs power | Daily pumping, working moms, exclusive pumping |
| Hospital-grade | Strongest suction, best for establishing supply, multi-user safe | Very large and heavy, very expensive (rental recommended) | Preemie moms, low supply, NICU babies |
| Wearable | Hands-free, fits inside bra, pump while moving | Weaker suction than traditional electric, higher cost, smaller capacity | Working moms on the go, multitasking, convenience |
Flange Size: The Most Important Factor
Choosing the right flange (also called breast shield) is more important than which pump you buy. An incorrect flange size can cause nipple pain, clogged ducts, mastitis, and reduced milk output.
How to Measure
- Measure when you have not recently pumped or nursed
- Measure the diameter of your nipple at its widest point (the base) in millimeters
- Add 2–3 mm to get your ideal flange size
- Example: nipple diameter 17 mm → 19–20 mm flange
- Measure both sides — your nipples may be different sizes
Signs of a Good Fit
- Nipple is centered in the flange tunnel and moves freely
- No pain during pumping
- Very little areola is pulled into the tunnel
- Nipple is not stretched, discolored, or pinched after pumping
Signs of a Wrong Fit
| Symptom | Too Small | Too Large |
|---|---|---|
| Nipple condition | Rubbing against tunnel walls, cracking, blistering | Excessive areola pulled in |
| Pain | Sharp, pinching pain during pumping | Dull ache, pulling sensation |
| Milk output | Compressed ducts reduce output | Inefficient suction reduces output |
| After pumping | White nipple, ring marks, creasing | Swollen nipple, puffy areola |
How to Use a Breast Pump: Step-by-Step
Step 1: Prepare
- Wash your hands with soap and water for at least 20 seconds
- Confirm all pump parts are clean and completely dry
- Sit comfortably and keep a glass of water nearby
Step 2: Trigger Let-Down
- Place a warm towel on your breasts for 2–3 minutes before pumping to encourage milk flow
- Looking at a photo or video of your baby stimulates oxytocin release and helps trigger let-down
- Start with your pump's stimulation/massage mode (fast, gentle suction)
Step 3: Pump
- Center the flange over your nipple and press it gently against your breast
- Once milk starts flowing, switch from stimulation mode to expression mode
- Set suction to the highest level that is still comfortable — more pain does not mean more milk
- Aim for about 15 minutes per side; do not exceed 30 minutes total
Step 4: Store
- Transfer pumped milk immediately into a storage container or breast milk bag
- Label with the date and time
- Place in the refrigerator or a cooler bag with ice packs right away
Pumping Schedules for Every Situation
How often you pump depends on your goals and circumstances.
Exclusive Pumping (pumping replaces all direct breastfeeding)
- First 6 weeks: every 2–3 hours, 8–10 times per day (including overnight)
- 6 weeks to 3 months: every 3 hours, 6–8 times per day
- 3 to 6 months: every 4 hours, 5–6 times per day
- 6 months and beyond: gradually reduce to 4–5 times per day
Working Mom (direct breastfeeding at home, pumping at work)
- Pump every 3 hours during work, for 2–3 sessions
- One session before leaving for work + direct breastfeeding after work
- Each pumping session: about 15–20 minutes
Supplemental Pumping (mostly direct breastfeeding, occasional pumping)
- Pump once after the first morning feed (when supply is highest)
- Pump 1–2 extra sessions before outings to build a small stash
CDC Cleaning Guidelines
Proper cleaning of pump parts is essential for your baby's safety. These steps are based on CDC recommendations.
After Every Pumping Session
- Disassemble all parts that touched breast milk immediately after pumping
- Do NOT wash parts directly in the sink — use a dedicated wash basin
- Scrub all parts in warm, soapy water
- Rinse thoroughly under running water
- Place on a clean paper towel or dedicated drying rack to air-dry completely
- Do NOT wipe dry with a towel (contamination risk)
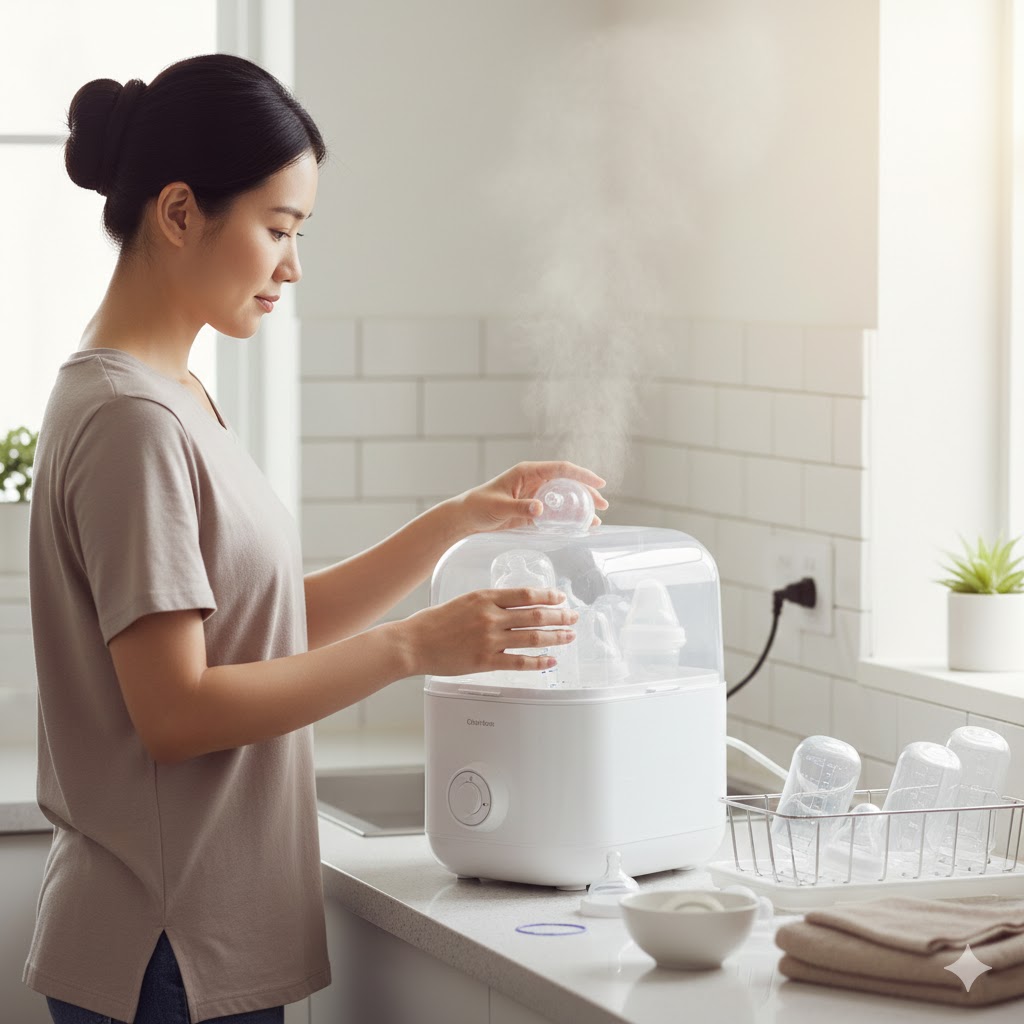
Sanitize (at least once daily)
- Boil disassembled parts in water for 5 minutes
- Or use a microwave steam bag or electric steam sanitizer
- Store only after parts are completely dry
Tubing Care
- In a closed-system pump, tubing does not touch milk and does not need routine cleaning
- If condensation appears in tubing after pumping, leave it attached to the pump and run the motor for 1–2 minutes to dry it out
- Replace tubing immediately if you see mold
Common Pumping Problems and Solutions
Low Milk Output
- Recheck your flange size (this is the most common cause!)
- Use a warm compress or breast massage before pumping to stimulate let-down
- Reduce stress — look at photos of your baby and stay relaxed
- Try power pumping: 20 min pump → 10 min rest → 10 min pump → 10 min rest → 10 min pump (1-hour cycle)
Pain During Pumping
- Turn down the suction — comfortable maximum is the sweet spot
- Check that your flange is not too small
- Apply a thin layer of lanolin or coconut oil to your nipple before pumping to reduce friction
- Persistent pain may signal mastitis — consult a lactation specialist
Clogged Ducts
- Apply a warm compress before pumping + gentle massage
- Massage toward the nipple, stroking down from the clogged area
- Increase pumping frequency to empty the breast more often
- If a clog lasts more than 48 hours or you develop a fever, see your doctor — this may be mastitis
Tips for Pumping at Work
Secure a Private Space
- Talk to your employer ahead of time about a clean, private space with a lock and an electrical outlet
- In many countries, employers are legally required to provide break time and a private space for pumping
What to Pack
- Breast pump + spare flanges and valves
- Breast milk storage bags + insulated cooler bag + ice packs
- Dedicated cleaning brush + wash basin (or refrigerate parts and wash at home)
- Extra nursing pads
Time Management
- Set alarms every 3 hours during your workday
- Use lunch break for an extra session if needed
- Each session: 5 min setup + 15 min pumping + 5 min cleanup = about 25 minutes
Frequently Asked Questions
Q: When should I start using a breast pump?
A: If direct breastfeeding is going well, wait until 3–4 weeks postpartum before introducing a pump. Starting too early can cause oversupply and increase mastitis risk. However, if your baby is in the NICU or cannot latch, begin pumping within hours of birth to establish supply.
Q: Is double pumping really better than single?
A: Yes. Double pumping cuts your session time in half and increases prolactin release, which boosts overall milk production. If you are short on time — especially if you are a working mom — a double electric pump is highly recommended.
Q: How long can I store pumped breast milk?
A: At room temperature (below 25°C/77°F) for up to 4 hours, in the refrigerator (4°C/39°F) for 3–5 days, and in the freezer (-18°C/0°F) for 6–12 months. Always label with the date and use the oldest milk first.
Q: My milk output keeps dropping. What can I do?
A: Increase your pumping frequency — milk production works on a supply-and-demand basis. Try power pumping (alternating pumping and rest for one hour) for 2–3 consecutive days. Also recheck your flange size, stay well hydrated, and manage stress.
Q: Is it safe to buy a used breast pump?
A: Hospital-grade (multi-user) pumps are designed for sharing — you just need your own personal accessory kit. However, standard consumer-grade electric pumps are intended for single users. Open-system used pumps may have had milk enter the motor, creating a hygiene risk that cannot be cleaned.
Track Your Pumping with BebeSnap
Recording your pumping sessions helps you track milk supply trends and optimize your schedule.
- Feeding & Pumping Log: Record pump time, volume, and which side — see your daily total and weekly trends at a glance
- AI Consultation: "My output is dropping" or "Pumping hurts on one side" — ask our AI chatbot for instant guidance
- Breast Milk Storage Timer: Log when milk was pumped to make sure you use it before it expires
References

Manage Easier with BebeSnap
AI stool analysis, feeding & sleep tracking, health reports—all in one app.
Medical Disclaimer: This article is for informational purposes only and does not replace professional medical advice. If you have concerns about your baby's health, please consult a pediatrician.
You Might Also Like
8-Month-Old Daily Schedule: 2 Naps, 3 Solid Meals & a Sample Timetable
Summer Baby Food Safety: Bottle Sterilizing, Feeding Hygiene, and Cooler Tips to Prevent Food Poisoning
Toddler Tantrums: Why They Happen and How to Respond in the Moment
Intussusception in Babies: Sudden Crying + Currant-Jelly Stool = ER Now
You Might Also Like
9 to 12 Month Baby Meal Schedule: Sample Feeding Routine for Solids, Milk, and Snacks
Use this 9 to 12 month baby meal schedule to plan 3 meals, 2 to 3 snacks, and regular milk feeds without crowding out breast milk or formula.

8- to 12-Month-Old Feeding Schedule: What to Feed Your Baby All Day
A simple feeding schedule for an 8- to 12-month-old often looks like 3 meals, 2 to 3 snacks, and breast milk or formula still carrying much of the day.
Baby Bottle Sterilization Guide | Boiling Time, When to Stop & Best Methods
How long should you sterilize baby bottles, and when can you stop? This guide answers the most common questions from new parents and covers boiling, steam, UV, and microwave sterilization.